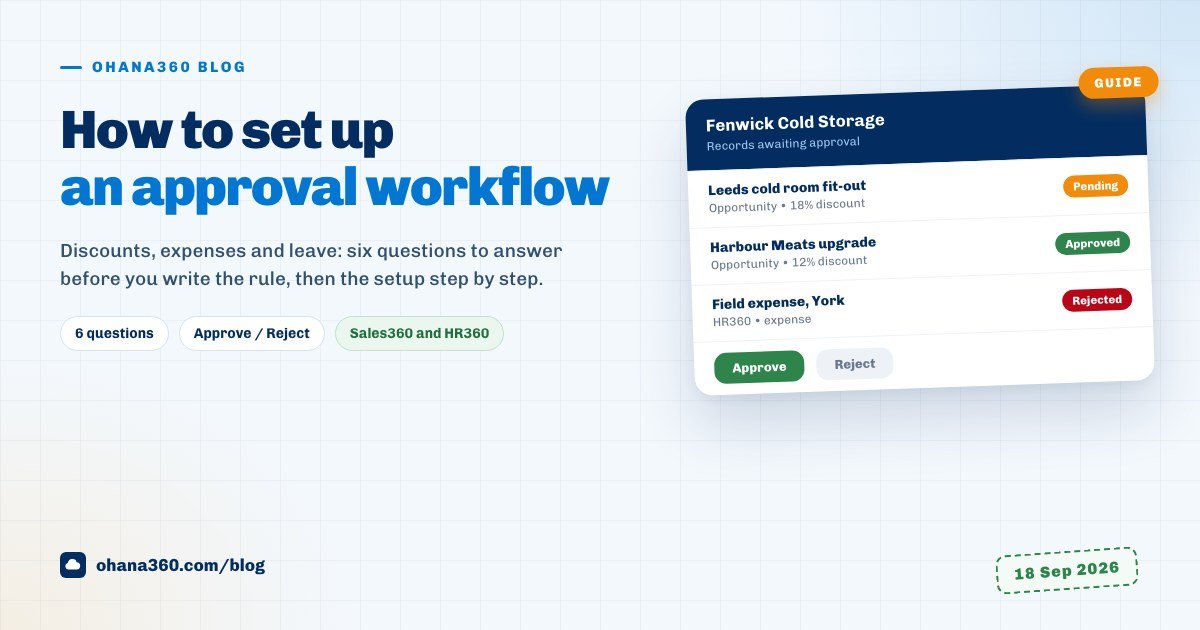
The short answer to how to set up an approval workflow is this: you tie a decision to a record reaching a certain state, the record is flagged as pending until someone decides, and the decision is written onto the record. Writing the rule takes five minutes. The long part is the six questions you should answer before writing it.
- Which decision needs sign-off? Write it as one sentence: "On deals above 40,000, no discount goes out without the sales manager's approval." An approval you cannot put in a sentence will not fit in a rule either.
- Which field measures the condition? An approval rule only looks at standard fields. If you cannot measure something like a discount percentage, you have to turn it into a stage.
- Who makes the call? The approval buttons appear for users with the Admin role. The approver is not picked in the rule; the role decides.
- What happens to the record while it waits? It is not locked. Telling the team to leave a pending record alone is your job.
- Who does what after the decision? Approval does not move the stage on by itself, and rejection does not roll fields back.
- Where will the trail live? When someone asks a year from now who approved that discount, the place to find the answer should already be decided.
Our example is Fenwick Cold Storage, a thirty-four-person firm in Leeds that sells and installs industrial cold rooms and refrigeration, with a sales team of six. Last quarter the sales manager got 52 discount requests over WhatsApp. Seven of them closed at more than fifteen per cent off before the manager had answered, and nobody noticed until the year-end margin review. The same quarter, 38 expense receipts went to accounts in an envelope, and leave was requested by text message. (Demo data.)
This guide follows how Fenwick moved those three approvals onto records, and what does not happen by itself in each case.
What does an approval workflow look like in a CRM?
An approval workflow has four parts: the trigger (which record, under what condition), the approver (who decides), the decision (approve or reject, and what follows) and the trail (where the decision sits on the record). In Ohana360 those four parts come together in one rule built on one screen. The drawing below puts what a rule does at the moment of saving next to what it does not do.
The key word in the drawing is "just". The rule checks whether the condition became true on this save: if the previous version of the record did not meet the condition and the new one does, the record goes to Pending. If the previous version already met it, the rule stays quiet. That design stops a record falling back into approval on every edit, but it leaves one gap, which we come back to below.
Step by step: building an approval rule in Ohana360
- Open Setup and, under Processes and Automation in the left menu, click Approval Processes. The list shows each rule's name, object, number of conditions and description.
- Press + New Rule and type the Rule Name. Take it from the decision sentence: "Discount approval, over 40k". The name also appears on the record's banner.
- Pick the Object. There are four on the list: Opportunity, Lead, Case and Account.
- Add conditions with + Condition. Each one is a field, an operator and a value. Number fields offer at least, at most and equals; picklists offer equals and not equals; text offers contains; dates offer before and after. All conditions must hold at once; there is no "or".
- In Description, write the sentence that appears in the notification: "Discount on a deal over 40k, needs the sales manager."
- Press Save. The rule joins the list as active; untick the box on the left to switch it off without deleting it.
The fields available for conditions are fixed per object, and your custom fields are not on the list:
| Object | Fields you can use in a condition | Typical approval |
|---|---|---|
| Opportunity | Name, stage, amount, probability, owner, close date, created date | Discounts, large quotes |
| Lead | Name, company, source, status, email, created date | Converting leads from a particular source |
| Case | Subject, status, priority, channel, case number, created date | Closing a critical case |
| Account | Account name, type, industry, annual revenue, owner | Changing the owner of a big account |
Discount approval: turning an unmeasurable condition into a stage
Fenwick's first problem was that the opportunity record has no discount percentage field, and an approval rule cannot read custom fields. The fix was to make the discount request a stage. In the Sales360 settings they added an opportunity stage called "Discount Approval" between Proposal and Negotiation. The rule: object Opportunity, condition one Stage equals Discount Approval, condition two Amount at least 40,000.
A rep asking for a discount no longer sends a WhatsApp message. They move the deal into Discount Approval and post the percentage they want in the record's Posts card. The record goes to Pending and lands in the Records Awaiting Approval card on the sales manager's home page. The manager opens it and presses Approve or Reject on the banner. For how to word the discount on the quote itself, the guide to writing a business quote covers it.
Who approves, and where is the decision made?
Three things happen to a pending record. An orange banner appears across the top: "Pending approval" and the rule's name. A notification titled "Pending approval", carrying the rule's description, lands in the bell. And the Records Awaiting Approval card on the home page lists every pending opportunity, lead, case and account.
The Approve and Reject buttons on the banner appear only for users with the Admin role. The rule does not name an approver, so approval authority is a decision about roles. At Fenwick the sales manager and the managing director hold the Admin role, and the six reps have the User role. That has a consequence: a change made by someone in the Admin role is never sent for approval. If the sales manager moves a deal into Discount Approval personally, no banner appears, because the person who would approve it is the one making the change.
The notification goes to the whole organisation: it shows up in the bell of everyone who can see opportunities. Treat that as visibility rather than a problem, but know that the rep reading it can see the pending record too.
What happens on approval or rejection?
| Decision | On the record | What does not happen by itself |
|---|---|---|
| Approved | The banner goes, an "Approved" alert hits the bell, the approval state is written to the record | The stage does not move, no task opens, no quote is sent |
| Rejected | A red banner stays: "This record was rejected in the approval process", and an alert hits the bell | Stage and amount are not rolled back, the record does not close |
A rejected deal has two ways forward: the rep changes the amount or stage to fall outside the condition and carries on, or corrects the request and moves the deal back into Discount Approval. In the second case the condition broke and then came true again, so the record goes back for approval. The drawing below compares five different saves under the same rule.
Row two is the easiest place to miss something: if the amount on an approved deal goes up later, the rule does not fire again. Fenwick closed that gap with a flow, and the next section shows how.
How do approval rules and flows work together?
Flows and approval rules run on the same save: record-triggered flows first, approval rules right after. Neither replaces the other. An approval rule holds a decision; a flow does a job: it updates a field, opens a task, sends a notification or an email, calls a webhook. Building flows is covered step by step in the guide to automated follow-up reminders; here we only cover where they meet approvals.
- The approval result does not trigger a flow. The approval state is not among the fields a flow condition can use. A flow like "once approved, send the quote" cannot be built; the rep takes the step after approval.
- A flow can share the rule's condition. A flow on the same condition (Stage equals Discount Approval) can send a phone push to everyone, or open a "wait for the manager" task for the deal owner. Flow actions go to everyone or to the record owner, not to a named person.
- A warning when the amount grows. The flow Fenwick built: object Opportunity, event update, conditions Amount changed and Stage equals Discount Approval, action a notification to everyone. If the amount moves after approval, the team sees it.
- Blocking is a validation rule's job. An approval rule flags a record; it never blocks the save. If you want a hard stop such as "amount cannot be zero", that is a validation rule.
How do HR360 leave and expense approvals work?
In HR360, approval needs no separate rule; it comes built into two objects. Every new leave request and every new expense opens in Pending status, and a "New leave request" or "New expense" notification goes to the organisation. A user with the Admin role presses Approve or Reject at the end of the row in the Leave Requests or Expenses list, and the status becomes Approved or Rejected.
That is how the envelope era ended at Fenwick: the field team logs fuel and lunch from their phones, and the managing director filters the Expenses list to Status Pending on Friday afternoon and decides in one sitting. The differences are worth knowing:
- No threshold. Every expense goes through approval; there is no "under 20 is approved automatically" setting. HR records are not on the object list of the Approval Processes screen either.
- Editing after approval. If the dates on an approved leave request are changed later, the status does not go back to Pending by itself.
- No balance deduction. An approved request is not taken off the employee's remaining leave automatically; you work the balance out by filtering the list. The method is in the employee leave tracking guide.
The trail: who approved this, and when?
The real value of an approval shows up a year later. For that, turn on the Field History system add-on. With it on, every save records the changed fields on the server with the person and the time, and they appear in the Field History card on the record page. On opportunities, leads, cases and accounts the approval state is listed under its technical name (approvalStatus): Pending to Approved, by whom, at what minute. On leave and expense records the same trail appears on the Status field.
With the add-on off, all you have is the record's Last Modified By and Last Modified Date, and both change on the next edit. The notification bell is not an archive either; it keeps the last fifty alerts. Switch the add-on on the day you switch the rule on.
Not included: what Ohana360 approval processes do not do
- No choice of approver. Any user with the Admin role can decide; you cannot name a person, a queue or the record owner's manager.
- No multi-step approval. There is one decision. Sequential or parallel approval such as "sales manager first, then managing director" cannot be built.
- No record lock. A pending record can be edited, and if a field whose condition was already met changes on an approved record, it is not sent for approval again.
- No automatic action after the decision. The approval state cannot be used in a flow condition; approval or rejection does not change the stage, open a task or send an email.
- Limited objects and fields. Rules cover four objects (Opportunity, Lead, Case, Account) and their standard fields; quotes, orders, invoices, custom objects and custom fields are out of scope. Records arriving by web form, API, mass update or import are not sent for approval.
A plan for the first week
| Day | What to do | Time |
|---|---|---|
| 1 | Count last quarter's approvals requested by message and turn each into a one-sentence decision rule | 30 minutes |
| 2 | Decide who approves, check their roles in Setup, and switch on the Field History add-on | 20 minutes |
| 3 | Add the Discount Approval stage in the Sales360 settings, write the rule, and adjust or switch off any sample rule | 20 minutes |
| 4 | With a User-role account, move a test deal into the stage; check the banner, the notification and the home page card, then approve it as an Admin | 15 minutes |
| 5 | Build the Amount changed warning flow and try it on the same test deal | 20 minutes |
| 6 | Write the team one paragraph: how to ask for approval, hands off while the banner is up, who takes the step after the decision | 15 minutes |
| 7 | Move leave and expenses into HR360 and put a weekly decision slot in the calendar | 15 minutes |
By the end of Fenwick's first month, 17 discount requests had been logged, 4 were rejected and none closed without approval. If records and objects are new vocabulary, what is CRM covers the basics. You can request a demo to try it with your own process, and current plans are on the pricing page.
Frequently asked questions
How do you set up an approval workflow in a CRM, and how long does it take?
Can I choose who approves?
Is a pending record locked?
Can I build an approval rule on the discount percentage?
Are HR360 leave and expense approvals set up on the same screen?
How do I see later who approved and when?
Take approvals out of the chat and onto the record
Make the discount request a stage, keep the decision on the record, and see who approved it in one click a year from now.