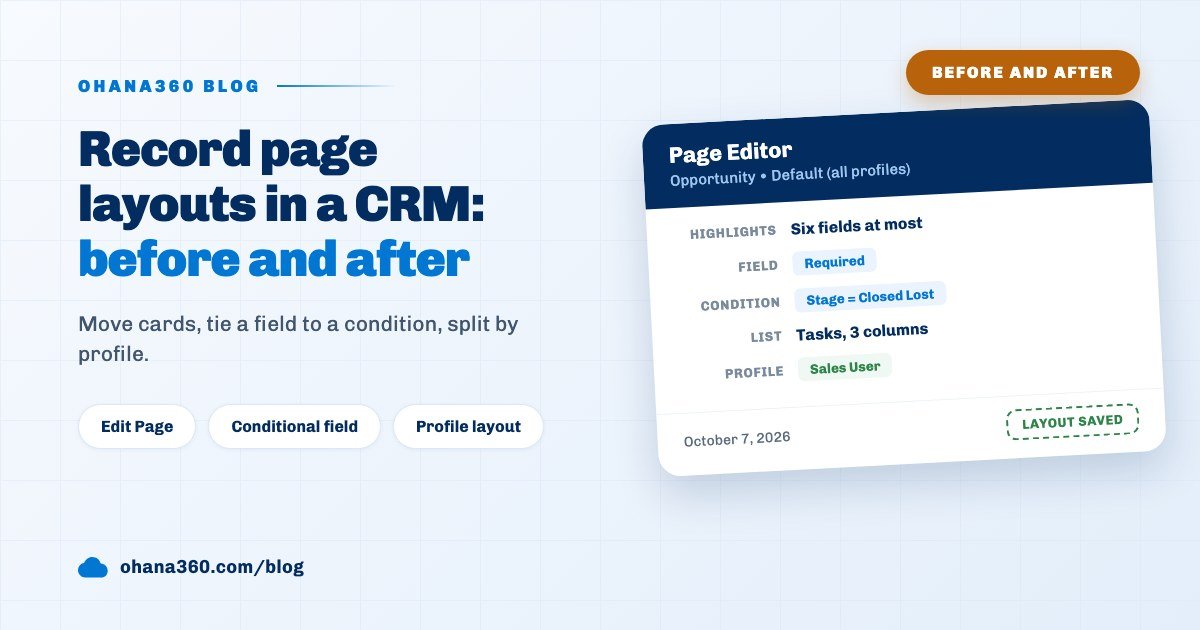
A record page layout in a CRM decides which fields, lists and cards appear on every record of an object, where they sit and in what order. In Ohana360 you open a record and choose Edit Page from the gear; you drag cards around, pick up to six highlights fields, make fields required, read-only or conditional, and press Save.
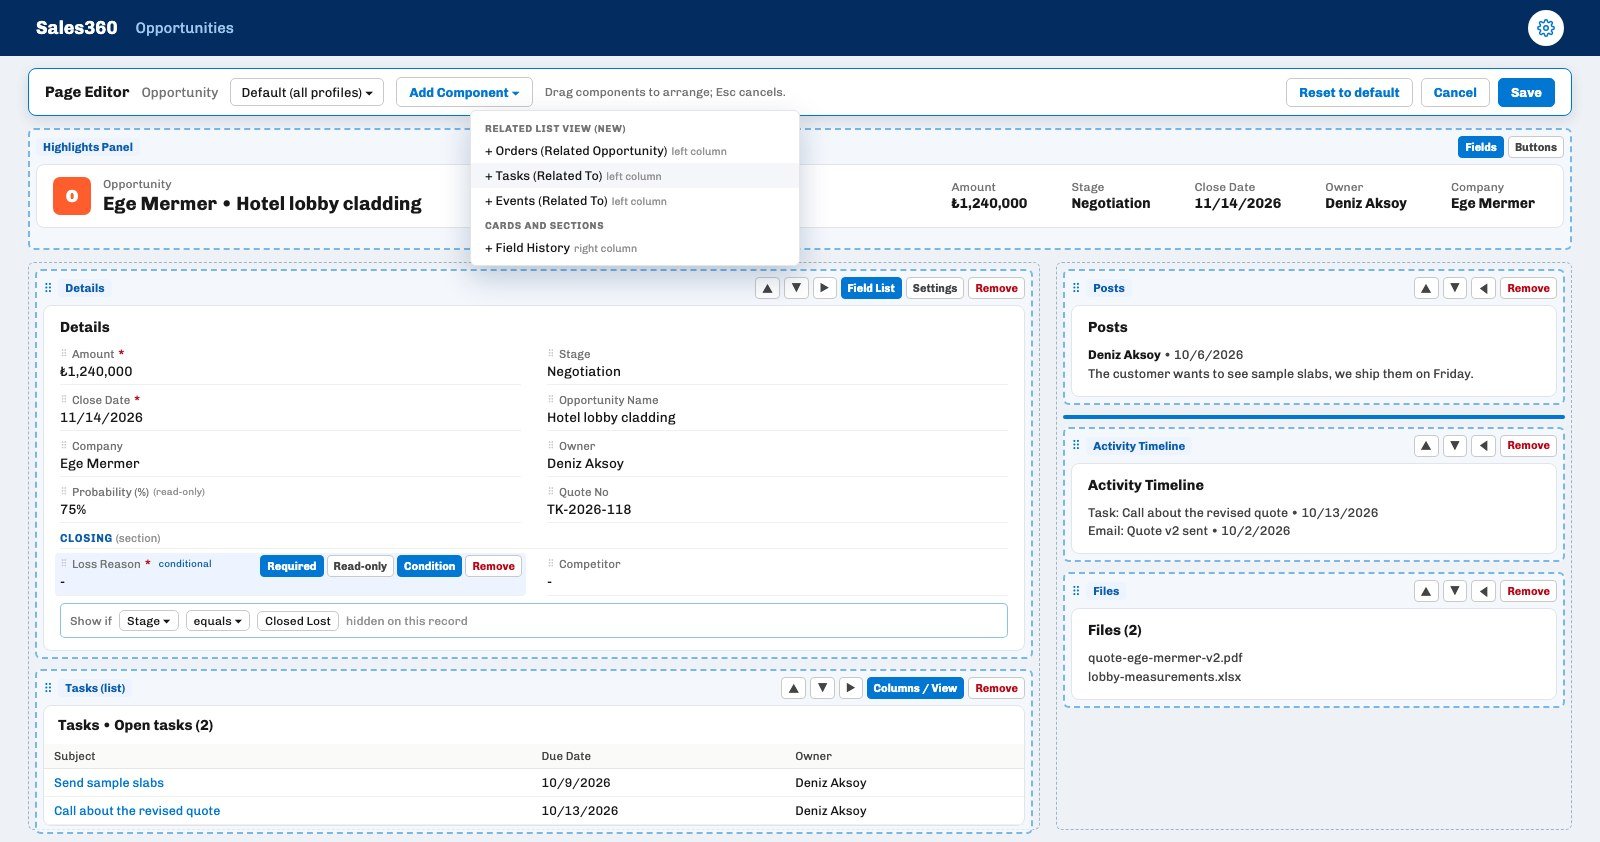
Ohana360 is a business cloud that keeps sales, service and marketing records in one database, and the same Page Editor works on opportunities, cases, contacts, accounts, the records of industry apps and the custom objects you build yourself. Below we put one opportunity page side by side, as the product default and as customized; the sections after it walk through how each of the five changes is made.
Why change a record page layout?
You change a record page layout so the team sees the right information in the first second of looking at a record. The product default is a general order that suits every team; a sales team wants amount and stage at the top, a service team wants priority and channel.
The need usually shows up in one of these ways:
- The important field sits too low. Whoever opens the opportunity scrolls down the Details card to find the amount.
- Unused cards take up room. A card the team never reads sits at the top of the right column.
- A field matters only sometimes. A loss reason belongs only on lost deals, yet it shows as an empty line on every opportunity.
- Everyone can change everything. A field calculated by a flow gets edited by hand and the report breaks.
- Linked records are out of sight. Seeing the open tasks of a deal means going to a separate list.
None of these five needs a new field or code; all of them are solved by arranging the fields and cards you already have. If you need a new piece of information, add the field first, as explained in the custom fields guide.
How do you open the Page Editor?
The Page Editor opens when you open any record, press the gear icon in the top bar and choose Edit Page from the menu. You edit on that one record, but the result applies to every record of the same object.
- Open a record. Any record of the object you want to edit will do; the fuller the sample record, the better you see the result.
- Choose Edit Page from the gear. The menu reads "Reorder, hide and move this record page's components". The Page Editor bar appears at the top of the page and every card gets a dashed frame.
- Choose who you are editing for. The selector in the bar opens on Default (all profiles). Pick a profile and your changes apply only to users with that profile.
- Make the changes and press Save. The message "Page layout saved; everyone in the org sees it." appears. To leave without saving, Cancel or Esc is enough.
Editing is open only to users with the Administrator role and happens in a desktop browser. Phones apply the saved layout: left column cards in order, right column cards as collapsible headers. Phone use is covered in the mobile CRM guide.
Which fields belong in the highlights panel?
The highlights panel is the strip of up to six fields under the record title that everyone sees first when they open the record. On opportunities the product default is Account, Amount, Close Date, Probability and Owner.
To change it, press the Fields button on the Highlights Panel frame; every field of the object, custom fields included, is listed as a pill. The order you pick is the display order, and trying to pick a seventh field shows "The highlights panel shows at most 6 fields." In the example Probability was removed, Stage added and Amount moved to the front.
The Buttons button on the same frame sets the order and visibility of the action buttons in the header. Conditional buttons such as Convert appear only when their conditions are met. The highlights panel cannot be removed from the page; only its content changes. To go back, the panel has a Back to default fields link.
How do you order fields and make them required or read-only?
In edit mode you order fields by holding and dragging them on the Details card; hovering over a field shows the Required, Read-only, Condition and Remove buttons. A blue line shows where the field will land.
- Order. Drop a field on the upper half of another field and it goes before it, on the lower half and it goes after it. A field dropped on the strip under the card goes to the end of the list. The same order applies to the new record and edit forms.
- Required. A red asterisk appears next to the label; the record will not save while the field is empty and a "field is required" warning shows.
- Read-only. The field cannot be edited on the record page or in the form, and the pencil icon disappears. In the example Probability was made read-only because it is written automatically when the stage changes.
- Remove. The field leaves the Details card and moves to the Hidden fields line under the card; press its pill there to bring it back.
- Section. In the Field List panel of the Details frame every field has a small text box next to it (its placeholder reads Department in the English interface). The name you type there becomes a section heading on the Details card and in the form, starting at that field. In the example a "Closing" section was placed before Loss Reason.
Created and last modified dates are system fields, always sit at the bottom and do not move. Field rules apply to the whole organization and do not differ by profile. If you need a more complex condition, for example "if the amount is over 100,000 the close date must be filled", use a validation rule instead of the required flag.
How do you set up conditional field visibility?
Conditional visibility means a field shows only while another field has a certain value: press the Condition button on the field and, in the Show if line, pick a field, an operator and a value if needed. There are four operators: equals, does not equal, is filled, is empty.
- Pick the field. In the example the cursor went over the Loss Reason custom field and Condition was pressed.
- Write the rule. "Show if Stage equals Closed Lost." At the end of the line the editor tells you whether the open record meets it, "visible on this record" or hidden, so you see the result before saving.
- Make it required if needed. A conditional field that is required is required only while it is visible. Loss Reason therefore does not block saving a won deal, and cannot be left empty on a lost one.
The most common mistake is the value. The comparison uses the raw value stored on the record, not the label on screen; case and leading or trailing spaces are ignored. Opportunity stages are stored in English: the stage the Turkish interface shows as Kaybedildi is stored as Closed Lost, and Kazanıldı as Closed Won. All stages are listed in the sales pipeline stages guide.
How do you add a related list or card to a record page?
You add a new piece to a record page from the Add Component menu in the Page Editor bar. The menu shows four groups: Related List View (new), Related Lists, Screen Flows, Cards and Sections.
- Related List View. A table of the records linked to this one. On opportunities it offers Orders, Tasks and Events; if another custom object has a Lookup field pointing at this object, that list joins the menu too. Use the Columns / View button on the new list's frame to choose columns; pick a saved list view and only records matching its filters are listed. In the example a Tasks list was added with three columns and an open tasks view.
- Screen Flows. Every active screen flow from Setup > Flows can sit on the record page as a card. The card shows the number of steps and a Start button; the flow opens prefilled with the record's account and contact. Flow setup is on the workflow automation page.
- Cards and Sections. Cards you hide land here and come back with one click.
Every frame on the page has up and down arrows, an arrow that moves the card to the other column and a Remove button; you can also hold and drag the card. In the example Posts moved to the top of the right column and Field History was removed.
How do you give different profiles a different record page?
You give different profiles a different record page by picking a profile in the Page Editor selector and saving the layout for that profile. A profile with its own layout shows a check mark next to its name.
The ready-made profiles are Full Access, Sales User, Service User and Standard (Own Records); your own profiles work the same way. A profile without its own layout sees the default. On the first save a full copy of the default is written to the profile and from then on the two layouts live separately: a card you add to the default does not reach that profile on its own. So open profile layouts only for teams that really need a different page. Which records each profile sees is covered in the user roles and permissions guide.
There is also a way to arrange right column cards without opening a record: Setup > Data Model > Record Page Layout. There you choose an object and a profile, switch cards on and off and reorder them, and the change saves at once. The second card on the same screen is Record Components: it places metric cards, a conversion funnel, a highlight strip or mini boxes in the top area of the record. Record Components do not differ by profile.
Not included: what record page layouts do not do
- A hidden field stays on core object forms. On Account, Contact, Lead, Opportunity and Case, a field you hide with Remove leaves the Details card but still shows on the new record and edit forms. Use a condition to take it off the form as well.
- Field rules do not differ by profile. Required, read-only, condition and section are the same across the organization; a profile layout only separates card placement, the highlights panel and the right column.
- A profile layout does not follow the default. It is copied on the first save; later changes to the default do not reach it.
- Required and read-only apply on screen only. The REST API, web forms, imports, flows and inline editing in list views do not read these two rules.
- A condition has one rule. A field's visibility depends on one field and one of four operators; there is no AND, OR, greater than or less than.
- The condition value is compared with the raw value. For opportunity stages you type the English value such as Closed Lost, not the translated label.
- The highlights panel holds six fields at most and cannot be removed from the page.
- There is one three-area template. A top area, a wide left column and a narrow right column; no tabs, accordions or third column. Components in the top area do not move between columns.
- Related list views have no sort or row limit setting. Every linked record is listed.
- Editing is open only to the Administrator role and to desktop. A non-administrator with setup permission sees Edit Page in the gear menu, but edit mode does not open.
- Layout history is not kept. The previous version of a saved layout is not stored; the only way back is Reset to default.
- Some labels are not translated yet. In the English interface the section box placeholder reads Department and the Object Manager tab still reads Sayfa Düzeni.
How do you build a good record page layout?
A good record page layout answers the question the team asks most often about that record on the first screen. Before changing the layout, ask the team "what do you look at first when you open this record?"; the answers are your highlights fields.
- Put decision fields in the highlights panel. In sales: amount, stage, close date; in service: priority, status, channel. The six field limit is a discipline, you do not have to fill it.
- Make calculated fields read-only. Editing by hand a field that a flow or formula writes breaks the report.
- Narrow required fields with conditions. Keep the number of always-required fields low; tie a field needed in one situation to that situation.
- Remove the card nobody reads. A removed card waits in the Add Component menu and comes back when needed.
- Open few profile layouts. Each profile layout needs its own upkeep; if no team works really differently, stay with the default.
- After saving, look again as a regular user. Because layouts can differ by profile, the page the administrator sees may not be the page the team sees.
Opportunity, lead, account and contact pages in Sales360 are shaped with the same Page Editor; the columns and filters of list screens are covered in the list views guide.