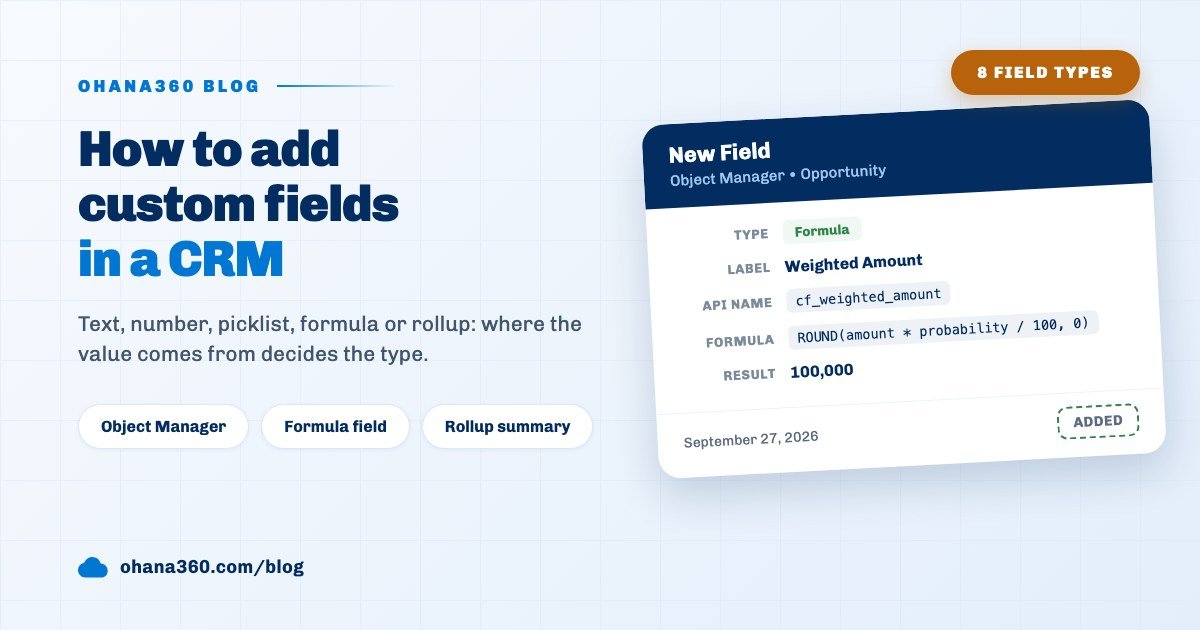
To add a custom field in Ohana360, open Setup > Object Manager, pick the object, click New Field on the Fields tab, choose a type, type the field label and click Add Field. The API name is created automatically with a cf_ prefix. The real decision is the type: will the value be typed in, calculated from the same record or rolled up from child records?
Ohana360 is a business cloud that keeps sales, service, marketing and industry records in one database. The built-in fields cover the first needs of every team; for information that is specific to you, such as a contract number, a decision maker's role or a weighted amount, you add a custom field. This is a decision guide more than a step list: it explains which of the eight field types to choose when, how formula and rollup fields are written, how a field reaches the page layout and reports, and where it stops.
Which question should you ask before adding a custom field?
The question to ask before adding a custom field is "where will this value come from?". The answer decides the field type, and the type decides what the field can do in forms, reports and rules. There are three possible answers.
- A user types it in: Text, Number, Date, Picklist, Lookup (Relation) or Link (URL). The value is stored with the record, asked for on the form and can be made required.
- It is calculated from fields on the same record: Formula. The value is not stored; it is recalculated every time the record opens and nobody can change it by hand.
- It is rolled up from linked child records: Rollup Summary. Like the number of opportunities or the total amount on an account, it counts or adds up the records in a related list.
The second question is "where will I use this field?". If you want to block a record or look for duplicates based on a value, the field has to be a typed-in type; calculated fields do not take part in those rules. If you want to add the value up in a report, pick Number or Rollup Summary.
How do you add a custom field in Ohana360?
A custom field in Ohana360 is added in five steps and becomes usable on the record page, in lists and in reports as soon as it is added. The example below adds a field to the Opportunity object.
- Open Object Manager: switch to Object Manager in the top tabs of the Setup page. The list on the left keeps standard objects and the custom objects you created in separate groups; pick Opportunity.
- Click New Field: the New Field button at the top right of the Fields tab opens the entry row.
- Choose the type: pick one of the eight types from the Type list. Picklist values are typed separated by commas, a Lookup asks for the target object, a Formula for the expression and a Rollup Summary for the related list and the summary operation.
- Write the label and help text: the Field Label is the name users see. The help text sits on the info icon next to the label in the Object Manager field list; answer "what does this field mean?" in one sentence. For typed-in types the Required box is here as well.
- Click Add Field: the API name that will be created is previewed under the row. A label such as Weighted Amount becomes cf_weighted_amount; a second field with the same API name cannot be added.
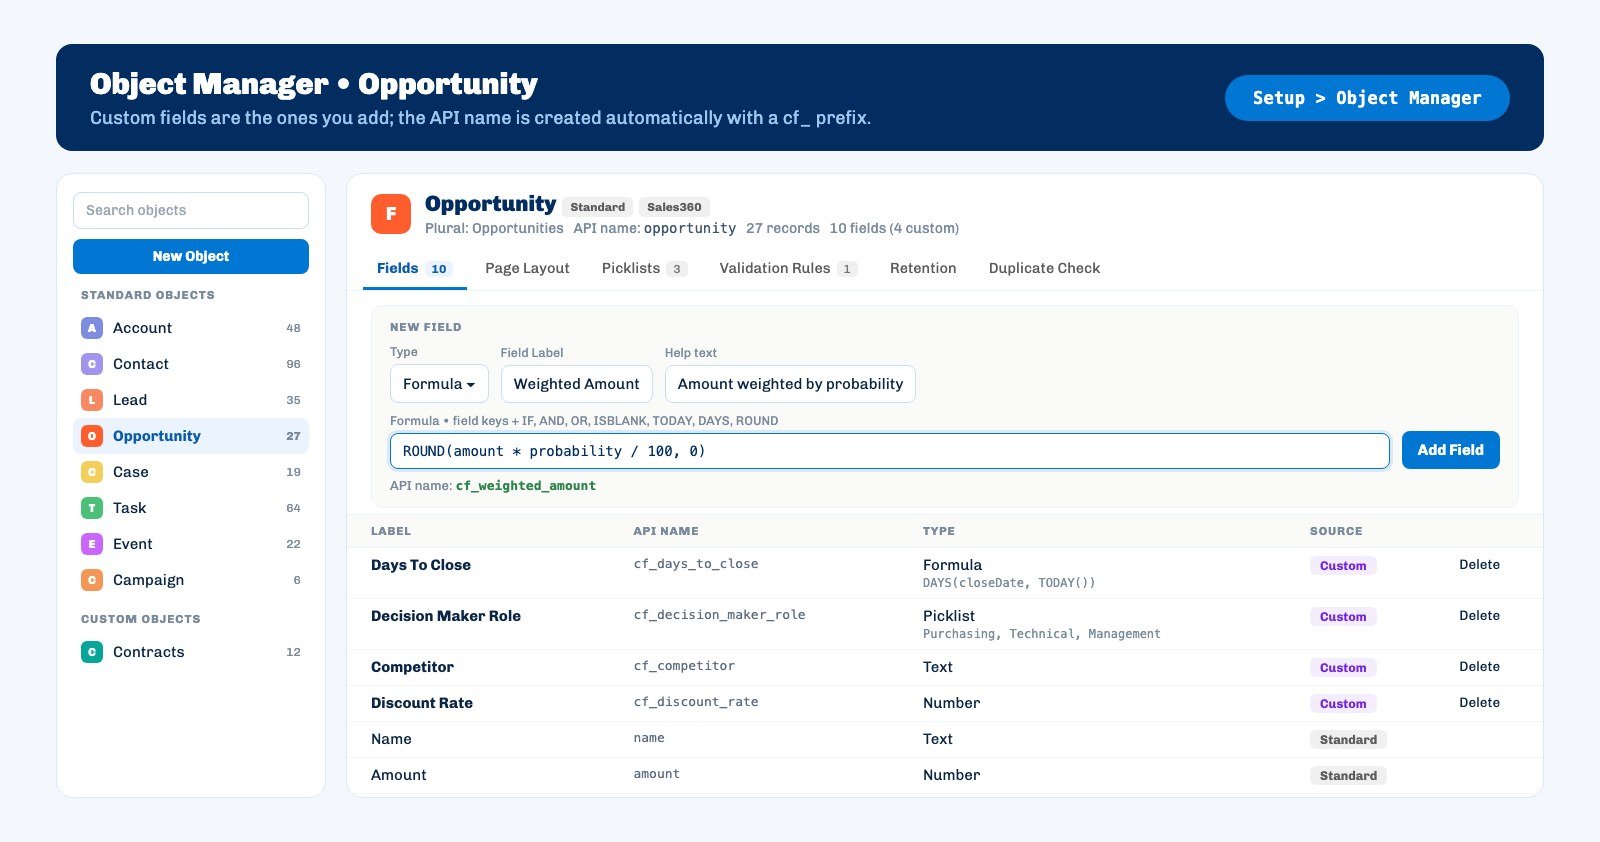
You can reach the same screen from a record page too: on the record page, the "+ New field (Object Manager)" link in the gear > Edit Page > Details > Fields panel takes you straight to that object's field list. Ohana360's own integrations use the same mechanism; for example, when Instagram360 is connected, a cf_instagram field is added to the Contact object.
Which field type should you choose for which data?
The right field type depends on the shape of the data and on what you will do with it later. The table below sums up when to choose each of the eight types and what to watch out for.
| Type | Choose it for | Example | Watch out |
|---|---|---|---|
| Text | Free, short information | Contract no., tax office | Can be grouped in reports but not summed |
| Number | A value to add up or compare | Employee count, annual budget | The only typed-in type with Total and Average in reports |
| Date | A day to track | Contract end, trial end | Day differences are calculated with DAYS in a formula |
| Picklist | One of a fixed set of values | Decision maker role, customer segment | Values can be changed later on the Picklists tab |
| Lookup (Relation) | A link to another record | From a custom object to an Account | Targets: custom objects, Account, Contact, Lead, Opportunity, Case, Matter |
| Link (URL) | An address to click | LinkedIn profile, contract folder | Becomes a clickable link even without https |
| Formula | A value derived from the same record | Weighted amount, days to close | Not on forms, read as text in reports |
| Rollup Summary | Count or total of child records | Total opportunity amount on an account | Only on built-in relations, no filter |
A practical rule: if you hear the same value from two teams in two different spellings, choose a Picklist. "Enterprise", "enterprise customer" and "ENTERPRISE" become three separate report groups; a picklist prevents that from the start. Free Text is for information that really differs on every record.
How do you write a formula field?
A formula field is a one-line expression that combines the API names of fields on the same record, numbers and functions. The Ohana360 formula language supports IF, AND, OR, NOT, ISBLANK, TODAY, DAYS, ROUND, ABS, MIN and MAX, the four arithmetic operators, the & sign for joining text and comparisons.
| Field label | Formula | On an opportunity with amount 250,000 and probability 40 |
|---|---|---|
| Weighted Amount | ROUND(amount * probability / 100, 0) | 100,000 |
| Deal Size | IF(amount > 100000, "Large", "Standard") | Large |
| Priority | IF(AND(amount > 100000, probability >= 50), "Priority", "Normal") | Normal |
| Days To Close | DAYS(closeDate, TODAY()) | 30 when the close date is 30 days away |
These four examples were tested with Ohana360's own formula engine. Keep three things in mind when writing one. First, fields are referenced by API name, not by label; standard field API names are in the API Name column of Object Manager, and custom ones start with cf_. Second, only the syntax is checked when you save: if you type amout instead of amount, the field is saved but records show #HATA (the error marker) as the result. Third, on records where a number field used in the formula was never filled in, the result is also #HATA, and wrapping it in IF does not fix it because IF evaluates both branches. Making the underlying field required is the cleanest fix.
Formulas that return text are very useful in reports. A formula that produces two or three values such as "Large" and "Standard" becomes a grouping field in the Report Builder, so you can split your opportunities by size without entering a separate field.
When should you use a rollup summary field?
A Rollup Summary is a field that counts or adds up the child records in a record's related list and shows the result as a single number on the parent record. Use it to see how many open cases an account has, its total opportunity amount or a patient's total payments.
- Account: Opportunities (amount, probability), Orders, Invoices, Cases, Contacts.
- Opportunity: Line Items (quantity, unit price). Campaign: Campaign Members. Order: Invoices.
- Industry apps: Hearings for a Matter, Appointments and Payments for a Patient, Reservations and Payments for a Guest, Contents and Payments for a Collaboration, Applications and Interviews for a Job Posting, Showings for a Listing, Expenses for an Employee.
The summary is one of five operations: Count, Total, Minimum, Maximum and Average. Count works on every relation; the other four need a number field on the child record, so relations without a number field, such as Cases or Contacts, only offer Count.
Rollups and formulas work together: a formula field can reference a rollup field on the same object. Add a "Case Count" rollup (cf_case_count) with Count over Cases to Account, then write IF(cf_case_count > 5, "Close follow-up", "Normal"), and accounts that open many cases gather in their own group in reports automatically.
How do you add a custom field to the page layout?
A new custom field is added, visible, to the end of the Details section of the record page the moment it is created; no extra step is needed. Its position, whether it is required and who can edit it are set in the page layout.
- Object Manager, layout tab: on standard objects every field has Visible, Required and Read-only boxes plus up and down arrows. Changes apply to the record page and forms together.
- Gear > Edit Page > Details on a record page: you order fields by drag and drop. A name typed into the Section box becomes a heading on the form and in Details from that field on.
- Conditional visibility: the Condition button shows a field based on another field's value; the options are equals, not equals, filled and empty. For example, a "Discount Reason" field appears only when "Discount Rate" is filled.
- List column: custom fields, formulas and rollups included, can be added as columns in the Select Fields to Display window of the list view gear menu.
There is one distinction on the new record form: custom fields join the Account, Contact, Lead, Opportunity, Case, Task and Event forms automatically. Formula and rollup fields never appear on a form, because their values are calculated. When the data already sits in a spreadsheet, the import steps in the CRM migration guide apply to custom fields too.
How do you use a custom field in reports?
Every custom field you add to a standard object joins that object's field list in the Report Builder automatically; there is no need to rebuild the report. You can use it as a filter, a grouping and a column.
For totals and averages the type decides. The measure list of the Report Builder has Record Count, Total and Average; Total and Average only open on number fields. Number and Rollup Summary enter that list, Formula does not, because the report reads a formula result as text. If you want to add up the weighted amount in a report, you need a Number field that is kept up to date or a related rollup instead of the formula.
The rest of report design, such as chart types, saved reports and dashboard tiles, is covered step by step in the sales reports guide. An example that adds a won revenue field to a campaign record and calculates the real return with a formula is in the campaign ROI guide.
Not included: what custom fields do not do
- No types beyond the eight. Checkbox, currency, percent, email, phone and long text types are not in the Object Manager list.
- Type and label cannot be changed later. A custom field row only has Delete; you delete a wrong type and add it again. Picklist values are updated on the Picklists tab.
- No formula or rollup on custom objects. These two types only appear in the type list of standard objects.
- A formula only reads its own record. It cannot reference a field on another record, such as the industry of the linked account, or another formula field; it can reference a rollup field on the same object.
- Formulas are not summed in reports. The result counts as text; it works in filters and groupings, but Total and Average are not available.
- No protection against empty fields. Records where a field used by the formula is empty show #HATA; a typo in a field name is not caught when you save either.
- Rollups have no filter. Lost opportunities and closed cases are counted too; the relations you can summarise are a fixed list, and custom objects do not take part in rollups as child records.
- Calculated fields stay out of rules. Formulas and rollups cannot be used as conditions in validation rules, assignment rules or duplicate checks.
- Form support covers seven core objects. A custom field added to an app object such as Campaign, Patient or Matter does not join that object's new record form automatically.
- Lookups work best on custom objects. On a custom object's form a lookup becomes a picker and the target record gets a related list; on standard object forms this field does not yet come as a picker.
What is the most common mistake when adding custom fields?
The most common mistake is opening a new Text field for every need: six months later you have fields nobody fills in, that cannot be grouped in reports and that hold the same information in three spellings. Before adding a custom field, run three checks: is this data already in a built-in field, is it one of a fixed set of values, and what will it be grouped by in reports?
A routine that works: add every new field with a help text, make everything you will group by in reports a Picklist, use a formula instead of asking people to type a value that can be calculated, and review empty fields in Object Manager every quarter. Also remember that custom fields stay on the lead when it is converted to an opportunity; we covered that in the lead conversion guide. Custom fields are managed from the same Object Manager on the standard objects of every app, starting with Sales360.